


Creating a complete Node.js test environment with Vitest, PostgreSQL and Prisma


Introduction
In the world of software development, testing is a critical aspect of ensuring the quality and reliability of a product. Unit tests and end-to-end tests are two important types of tests that developers use to identify and fix bugs before releasing their code into production. Unit tests focus on testing individual functions and modules in isolation, while end-to-end tests simulate user behavior and test how the system works as a whole, including its interaction with external systems and dependencies. In this article, we will explore how to create a complete Node.js test environment using Postgres and Prisma. By setting up a robust testing infrastructure, we can catch bugs early and ensure that our code is performant and reliable in production. We will walk through the steps required to set up a test environment. With the right tools and mindset, testing can become an integral part of your development process, helping you to create high-quality software that meets the needs of your users.
Paving the way
Let's configure the necessary tools.
Prisma
So, the first thing we have to do is install the required dependencies. I'm going to use NPM as the package manager here, but feel free to use your preferred tool.
To start, we need to install the Prisma CLI in our project by running:
npm i prisma -D
This way we can execute commands like npx prisma migrate dev and others alike in our project. Since we only use the Prisma CLI in our development environment, we can install it as a development dependency as recommended by the Prisma documentation.
Now we can start Prisma by using:
npx prisma init
This will create a new prisma/schema.prisma file. This is a declarative configuration file where we can define our database schema using the Prisma Schema Language.
💡 Tip for VSCode users: as an extra step, you can install the Prisma extension and also add this to your VSCode configuration:
"[prisma]": {
  "editor.formatOnSave": true
},
This will make sure that your schema.prisma file is always auto formatted every time you save.
By default, Prisma already sets the database provider as postgresql, so your schema.prisma file should look something like this:
// This is your Prisma schema file,
// learn more about it in the docs: https://pris.ly/d/prisma-schema

generator client {
  provider = "prisma-client-js"
}

datasource db {
  provider = "postgresql"
  url      = env("DATABASE_URL")
}
Feel free to define your models there.
Next up, we can execute the Prisma generate command:
npx prisma generate
This will read our schema.prisma file and generate the Prisma client based on the data models defined in it.
The next thing we need to do is, of course, configure our database.
By default, Prisma already generates a .env file with an example PostgreSQL database URL. It should look something like this:
# Environment variables declared in this file are automatically made available to Prisma.
# See the documentation for more detail: https://pris.ly/d/prisma-schema#accessing-environment-variables-from-the-schema

# Prisma supports the native connection string format for PostgreSQL, MySQL, SQLite, SQL Server, MongoDB and CockroachDB.
# See the documentation for all the connection string options: https://pris.ly/d/connection-strings

DATABASE_URL="postgresql://johndoe:randompassword@localhost:5432/mydb?schema=public"
PostgreSQL
To set up our database, I'm going to use Docker here. If you already have PostgreSQL installed in your machine, feel free to use it. If you want to use Docker just like me, you can follow the installation tutorial here.
With Docker installed, we can pull the PostgreSQL image by running:
docker pull bitnami/postgresql
And then create our Docker container by running
docker run --name node-test-env-pg -e POSTGRESQL_USERNAME=docker -e POSTGRESQL_PASSWORD=docker -e POSTGRESQL_DATABASE=node-test-env -p 5432:5432 -d bitnami/postgresql
This will create a container with the name "node-test-env-pg", username "docker", password "docker" and database with the name "node-test-env" on port 5432 in detached mode by making use of the bitnami/postgresql image we just pulled.
Now we can change the DATABASE_URL inside the .env file created by Prisma with the new connection URL:
DATABASE_URL="postgresql://docker:docker@localhost:5432/node-test-env?schema=public"
The username changed from "johndoe" to "docker", the password changed from "randompassword" to "docker" as well, and the database name changed from "mydb" to "node-test-env", which are the parameters we specified when creating our Docker container.
To test if everything is working properly, we can now execute the Prisma migration command inside our project:
npx prisma migrate dev
Choose a name for your first migration and confirm. This will create and run the database migrations for you. If you are not yet familiar with database migrations, you can check out this article.
TypeScript (optional)
We can begin installing TypeScript by adding typescript, node types, tsx and tsup to our project:
npm i typescript @types/node tsx tsup -D
The tsx package will be responsible for running our application in the development environment, and the tsup package will be necessary to bundle our application.
We can now initialize TypeScript by using:
npx tsc --init
This will create our tsconfig.json file.
In the tsconfig file, we can change the target to es2020 (as es2020 is 100% supported since Node.js 14.0.0).
{
  "compilerOptions": {
    ...
    "target": "es2020",
    ...
  }
}
To avoid the relative import hell, we can also uncomment the baseUrl line and set custom paths in this configuration file:
{
  "compilerOptions": {
    ...
    "baseUrl": "./",
    "paths": {
      "@/*": ["./src/*"]
    },
    ...
  }
}
This way, instead of having to import stuff like this:
import { someModule } from '../../../../../some-file';
We can import stuff using absolute imports like this:
import { someModule } from '@/custom/path/to/some-file';
Much better, right?
To avoid always having to import things like "test" and "expect" from Vitest, we can also add vitest/globals to our tsconfig configuration file:
{
  "compilerOptions": {
    ...
    "types": [
      "vitest/globals"
    ],
    ...
  }
}
And in our vitest.config.ts file we specify test globals as true:
export default defineConfig({
  ...
  test: {
    ...
    globals: true,
    ...
  },
  ...
});
And now you can remove vitest imports from your test files. Our sample.spec.ts would be like this:
test('should execute', () => {
  expect(1 + 1).toBe(2);
});
We can also take a moment and add the required scripts to run our project. Add them in your package.json file:
...
"scripts": {
  ...
  "start:dev": "tsx watch src/index.ts", // change the path to match your project initialization file
  "start": "node build/server.js",
  "build": "tsup src --out-dir build",
  ...
}
...
Vitest
Ok, now is the time to configure our test runner.
We can install Vitest normally with:
npm i vitest -D
If you are using TypeScript with custom paths, you can also install vite-tsconfig-paths.
npm i vite-tsconfig-paths -D
What we need to do now is create our Vitest config file. Create a vitest.config.ts (vitest.config.js if you are not using TS) in the root directory of your project with the following content:
import tsconfigPaths from 'vite-tsconfig-paths'; // only if you are using custom tsconfig paths
import { defineConfig } from 'vitest/config';

export default defineConfig({
  test: {},
  plugins: [tsconfigPaths()],  // only if you are using custom tsconfig paths
});
If you run npx vitest run now, all your tests should be running. Nice!
If you don't have any tests yet, you can begin by creating a sample.spec.(ts|js) file that just tests if 1+1 is equal to 2:
import { test, expect } from 'vitest';

test('should execute', () => {
  expect(1 + 1).toBe(2);
});
To avoid manually having to run vitest with npx every time, we can create a new npm script inside the project global package.json. Let's add the following scripts there:
...
"scripts": {
"test": "vitest run",
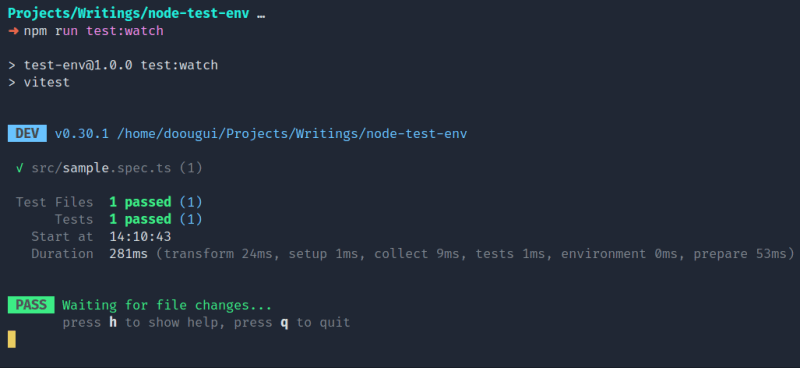
"test:watch": "vitest"
},
...
The test script will run the tests only once, while the test:watch script will keep watching for file changes and re-run the tests accordingly.
We can also add a script to run tests with the test coverage report. Let's add it to our package.json:
...
"scripts": {
  ...
  "test:coverage": "vitest run --coverage"
},
...
If you run this script, it will ask you to install the @vitest/coverage-c8 package to your project. Install it and run it again with npm run test:coverage and you should see your tests running and a new coverage folder in your project. Open the index.html inside the coverage folder and you should be able to see details about the test coverage of your project. Also, this folder can be safely added to your .gitignore, since it will be generated every time you run the test:coverage command.
Unit and E2E tests
As mentioned in the Introduction, unit tests and E2E tests are both really important aspects of software development. They ensure that everything is working fine and allow us to find bugs before users do.
If you are executing unit tests, it's completely fine to have in-memory databases. Since unit tests are designed to test individual units of code in isolation, an in-memory database can provide a quick and easy way to test database interactions without relying on a real database. This can speed up test execution time and simplify the testing process. However, in-memory databases are not suitable for end-to-end testing because they do not accurately reflect the behavior of a real database. End-to-end tests are designed to test the entire system from start to finish, including its interaction with external systems and dependencies, such as a real database. In-memory databases do not provide the same level of complexity and reliability as a real database, and may not accurately reflect the behavior of a production database. For this reason, we are going to configure a entirely new test environment to run our end-to-end tests with Vitest.
Creating Prisma Test Environment
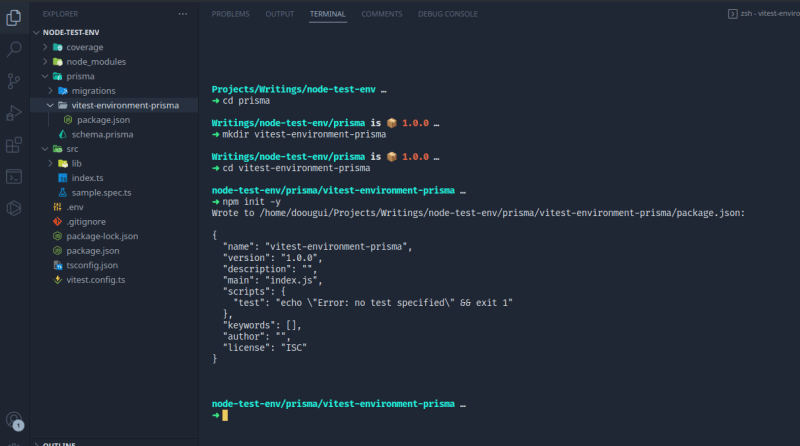
Inside our root prisma folder, we will start by creating a new vitest-environment-prisma directory.
Since Vitest environments need to be a package, we can now open this directory with our terminal and run npm init -y there to create a new one.
The next thing we'll need to do is create a prisma-test-environment.ts file alongside our newly created package.json.
After creating the prisma-test-environment.ts file, now we need to change the entry point of our prisma/vitest-environment-prisma/package.json file to be the prisma-test-environment file we just created:
{
  ...
  "main": "prisma-test-environment.ts",
  ...
}
As stated in the documentation, a custom Prisma test environment looks something like this:
import type { Environment } from 'vitest';

export default <Environment>{
  name: 'custom',
  setup() {
    // custom setup
    return {
      teardown() {
        // called after all tests with this env have been run
      }
    }
  }
}
This is exactly the structure we will use in our prisma-test-environment.ts file:
import type { Environment } from 'vitest';

export default <Environment>{
  name: 'prisma',
  setup() {
    // custom setup
    return {
      teardown() {
        // called after all tests with this env have been run
      }
    }
  }
}
The only difference is that the name of the environment needs to be set to "prisma".
Since we need a new, clean database for each test suite, we will need to do a few things. The approach we are going to use here is:
For each test suite, we:
Initialize Prisma Client;
Generate a new database schema with a random name (PostgreSQL uses "public" as default);
Update the DATABASE_URL defined in our
.envfile;Execute Prisma migrations;
At the end of every test suite, we:
Drop the newly created schema;
Disconnect from Prisma;
Let's start by initializing the Prisma client:
import type { Environment } from 'vitest';
import { PrismaClient } from '@prisma/client';

const prisma = new PrismaClient();

export default <Environment>{
  ...
}
Now, in our setup function, we need to generate our random schema name:
import type { Environment } from 'vitest';
import { PrismaClient } from '@prisma/client';
import { randomUUID } from 'node:crypto';

const prisma = new PrismaClient();

export default <Environment>{
  name: 'prisma',
  async setup() {
    const schema = randomUUID();

    return {
      async teardown() {
        ...
      },
    }
  },
}
I'm using node:crypto to generate a random uuid here, but feel free to use any tool that generates a random, unique string.
If you remember correctly, our DATABASE_URL follows a structure that looks something like this:
DATABASE_URL="postgresql://docker:docker@localhost:5432/node-test-env?schema=public"
The only thing we are going to do is replace the "public" schema with the newly generated schema name.
Let's create a function to regenerate our DATABASE_URL with the new schema:
import 'dotenv/config';
import { randomUUID } from 'node:crypto';
import { Environment } from 'vitest';
import { PrismaClient } from '@prisma/client';

const prisma = new PrismaClient();

function generateDatabaseURL(schema: string) {
  if (!process.env.DATABASE_URL) {
    throw new Error('Please provide a DATABASE_URL environment variable.');
  }

  const url = new URL(process.env.DATABASE_URL);

  url.searchParams.set('schema', schema);

  return url.toString();
}

export default <Environment>{
  name: 'prisma',
  async setup() {
    const schema = randomUUID();
    const databaseURL = generateDatabaseURL(schema);

    process.env.DATABASE_URL = databaseURL;

    return {
      async teardown() {
        ...
      },
    }
  },
}
Also, make sure to install the dotenv package:
npm i dotenv
Now we just need to execute our migrations with Prisma:
import 'dotenv/config';
import { randomUUID } from 'node:crypto';
import { execSync } from 'node:child_process';
import { Environment } from 'vitest';
import { PrismaClient } from '@prisma/client';

const prisma = new PrismaClient()

function generateDatabaseURL(schema: string) {
  ...
}

export default <Environment>{
  name: 'prisma',
  async setup() {
    const schema = randomUUID();
    const databaseURL = generateDatabaseURL(schema);

    process.env.DATABASE_URL = databaseURL;

    execSync('npx prisma migrate deploy');

    return {
      async teardown() {
        ...
      },
    }
  },
}
Here, we are using npx prisma migrate deploy instead of npx prisma migrate dev because we don't want to check for any changes in our schema.prisma file (therefore, creating a new migration). We just want to execute our current migrations and that's exactly what npx prisma migrate deploy does.
Right. Now, the only thing left is our teardown function. This will be executed at the end of every test suite. As described in the steps listed above, we need to DROP our schema and disconnect from Prisma. So this is exactly what we are going to do:
...
export default <Environment>{
  name: 'prisma',
  async setup() {
    const schema = randomUUID();

    ...

    return {
      async teardown() {
        await prisma.$executeRawUnsafe(
          `DROP SCHEMA IF EXISTS "${schema}" CASCADE`,
        );
        await prisma.$disconnect();
      },
    }
  },
}
This drops the schema if it exists and disconnects from the Prisma client.
Our Prisma test environment file is done!
Telling Vitest when to execute unit or e2e tests
Currently, if we run the previously created test or test:watch scripts, all tests will run, including unit and E2E tests. This is not good because, as we saw earlier, unit and end-to-end tests are completely different type of tests. For this reason, we are now going to create two different Vitest configurations: one for unit tests, and one for e2e tests.
To do this, we can begin by creating two files alongside our vitest.config.ts:
vitest.e2e.config.ts and vitest.unit.config.ts.
Inside our vitest.unit.config.ts, we can tell Vitest that we want to exclude any file containing the extension *.e2e-spec.*:
import { configDefaults, defineConfig, mergeConfig } from 'vitest/config';
import vitestConfig from './vitest.config';

export default mergeConfig(
  vitestConfig,
  defineConfig({
    test: {
      exclude: [
        ...configDefaults.exclude,
        '**/*.e2e-{test,spec}.{js,mjs,cjs,ts,mts,cts,jsx,tsx}',
      ],
    },
  }),
);
Here, we merge our old vitest.config.ts file with our common configuration (like the tsconfigPaths plugin). This way we don't have to define everything twice.
In our test object, we tell Vitest that we don't to run any test files that are named like *.e2e-{test|spec}.*. This will ensure that no end-to-end tests are run when using this configuration file.
Inside our vitest.e2e.config.ts, we will do something similar:
import { defineConfig, mergeConfig } from 'vitest/config';
import vitestConfig from './vitest.config';

export default mergeConfig(
  vitestConfig,
  defineConfig({
    test: {
      include: ['**/*.e2e-{test,spec}.{js,mjs,cjs,ts,mts,cts,jsx,tsx}'],
      environmentMatchGlobs: [['src/**', 'prisma']],
    },
  }),
);
Just like the previous file, we merged the common Vitest config. In this file, instead of excluding the "*.e2e-{test|spec}.*" files, we include them. This way we only execute specific e2e test files.
Also, we added a new environmentMatchGlobs object that tells Vitest that, for every file inside our src folder, we want to use our previously created prisma test environment.
The only thing left now is to create our test scripts.
In the project package.json, we are going to modify our current test scripts that we added earlier, as well as add new test scripts for e2e tests.
First of all, let's specify the config file for our already created test commands with the -c flag:
"scripts": {
  ...
  "test": "vitest run -c vitest.unit.config.ts",
  "test:watch": "vitest -c vitest.unit.config.ts",
  ...
}
This will tell Vitest that we want to use the vitest.unit.config.ts file we just created as the configuration file.
Now, we can add the new commands for executing end-to-end tests:
"scripts": {
  ...
  "test:e2e": "vitest run -c vitest.e2e.config.ts",
  "test:e2e:watch": "vitest -c vitest.e2e.config.ts",
  ...
}
This is the same thing, but instead of using the vitest.unit.config.ts as our configuration files, we are going to use our vitest.e2e.config.ts file. This is going to ensure that only e2e tests are run when this script is executed.
Linking test environment
Since every Vitest custom test environment always needs to be a package, we need to link our project to the prisma test environment we created, otherwise it won't be recognized and our end-to-end tests won't run properly. To do this, we can add some scripts to run before executing our end-to-end tests. In our package.json, we will add the following scripts:
"scripts": {
  ...
  "test:create-prisma-environment": "npm link ./prisma/vitest-environment-prisma",
  "test:install-prisma-environment": "npm link vitest-environment-prisma",
  "pretest:e2e": "run-s test:create-prisma-environment test:install-prisma-environment",
  ...
}
The
test:create-prisma-environmentcommand will create the Prisma environment. Here, we use npm link which creates a symbolic link between the package and the location where it would normally be installed;The
test:install-prisma-environmentcommand will install the Prisma environment in our project;The
pretest:e2ecommand will always run before we runnpm run test:e2e. This command runs both thetest:create-prisma-environmentand thetest:install-prisma-environment. It usesrun-sfrom thenpm-run-allpackage, so make sure to install it with:
npm i npm-run-all -D
From now on, every time you create a file with "e2e-spec" or "e2e-test" in its name and run npm run test:e2e or npm run test:e2e:watch, it will be included in the "tests to run" by Vitest and will execute, making sure everything is working in your project.
Conclusion
In this article, we manage to configure an entire Node.js environment with TypeScript, PostgreSQL, Prisma and Vitest. We also learned about the about unit and end-to-end tests and how they differ.
By now, you should have a project that allows you to ensure the quality and reliability of your code before shipping to users.
Feel free to suggest improvements and/or corrections 🙂.
The complete code of this article can be found here.